
Golf Course
About The Golf Course
Nine beautiful holes of golf that will challenge every part of your game. The experience starts and ends with the ‘can’t miss’ 1st and 9th hole vistas. Beyond that is a mix of layouts and landscapes that demand accuracy, consistency, creativity and most of all, patience.
If you can get through a round here with one ball, you can play anywhere.
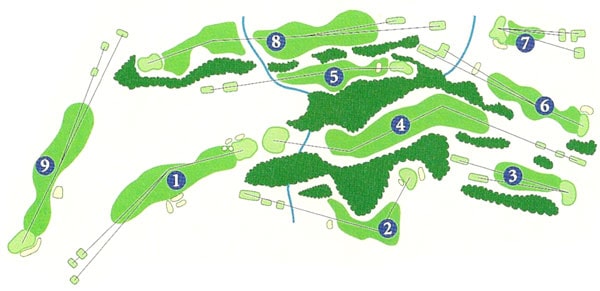
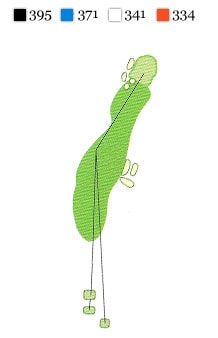
- Hole 1 - Par 4
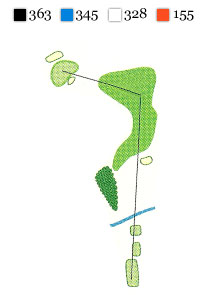
- Hole 2 - Par 4
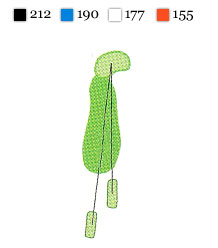
- Hole 3 - Par 3
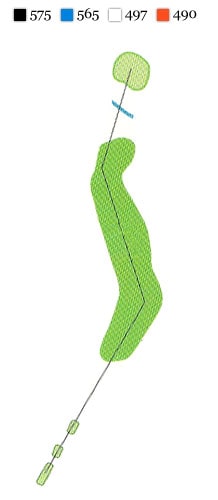
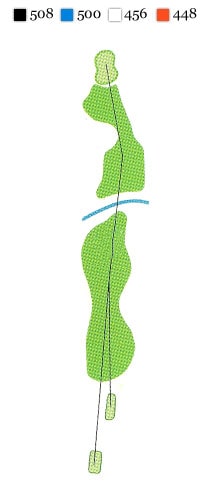
- Hole 4 - Par 5
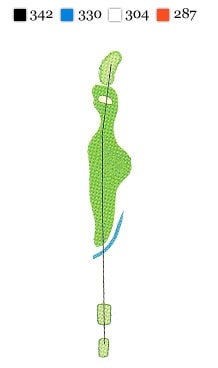
- Hole 5 - Par 4
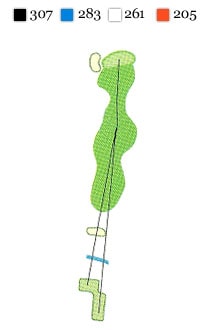
- Hole 6 - Par 4
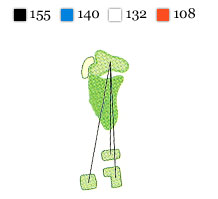
- Hole 7 - Par 3
- Hole 8 - Par 5
- Hole 9 - Par 4
A very nice starting hole. Plenty of room to hit the driver here. Just guard against going to the right, as there is a hazard and trees all along that side, and bunkers in the landing area in the rough. Bunkers protect the left side of the green, so when the pin is on the left a play for the middle of the green is recommended.
A short but very tricky par 4. The tee shot is the key here. Don’t try to cut the corner… hit it to the dogleg and then you can attack the flag. Shots hit too far off the tee will find the trees on the far side of the fairway. The more you play here, the easier the tee shot will get. The green can be tricky, so take a good look at the line on your putts.
This uphill par 3 doesn’t yield many birdies as it is tough to see exactly where the pin is. Make sure to take enough club with the elevation, but not too much as O.B. is lurking over the green. Par is a good score here.
Definitely the signature hole here at Hidden Creek. Caution is a must throughout the entire hole. Being a double dogleg, this is a 3 shot par 5. I would recommend accuracy off the tee. You will most likely be laying up before the creek in front on the green on your second shot so why chance getting in trouble. On the second shot choose your target landing area and swing with confidence. Take dead aim on your approach to the green, and work hard on your putts. I have seen some big numbers here so par or even bogey might not be a bad score. Good luck.
Another tree lined hole, the tee shot requires more accuracy over distance. Once in play, your second shot is not as easy as it looks. A bunker short of the green and trouble left and right demand that you aim at the middle of the green. This green will let some birdie putts in so work hard for the right line.
A short par 4. You can get as aggressive as you want here off the tee but I would go for the middle and then attack on the second shot. The double level green can make for some long birdie putts, and some 3-putts so use caution and putt defensively.
This is a nice par 3. This large green is very receptive but club selection is high priority with the hazard over the green. If you are stuck between clubs, take the shorter one, as the elevation may make up for the difference.
This par 5 can be reached in 2 but it’s a classic risk-reward hole. O.B. all the way up the right, trees left and a cross creek are formidable obstacles here. As you approach the green there is some elevation to deal with, and shots into the green need to be accurate as well. The green is pretty straight forward so once you get there you can make some putts. Take your chances if you dare but be prepared for anything here.
A nice finishing hole. You can go for the booming drive here as there is plenty of room left, and the O.B. on the right is a good distance from the fairway. The bunker on the left of the green can be sneaky but there is plenty of room to go at the pin. This hole is very fair and should allow for that good feeling that always brings us back for another round when you finish with a birdie or par.

Contact Information
17 Morgan Road
Litchfield, NH 03052
(603) 262-9272